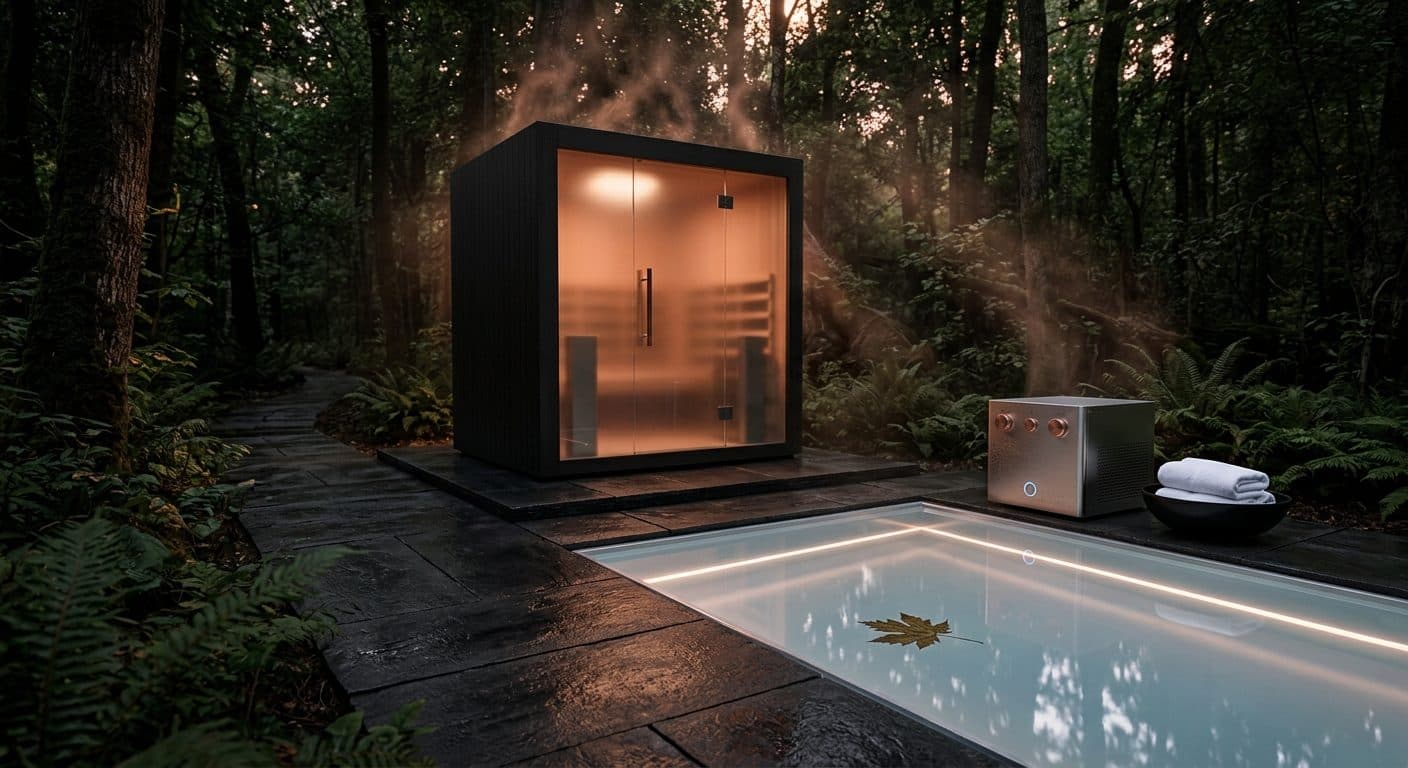
How to Set Up an Outdoor Contrast Therapy Zone
Set up an outdoor contrast therapy zone by pairing an infrared sauna operating at 120–150°F with a cold plunge equipped with a chiller. The chiller keeps the water temperature consistent, while the sauna provides deep far-infrared warmth without the oppressive ambient heat of a traditional sauna. Alternating between them supports recovery and autonomic regulation.
Why Build an Outdoor Contrast Therapy Zone with Infrared Sauna and Cold Plunge
Contrast therapy benefits are grounded in physiology. The cycle of heat and cold triggers vasodilation and vasoconstriction, pumping blood through your tissues like a natural pump. Dr. Andrew Huberman describes this as a powerful tool for autonomic regulation, training your nervous system to adapt to stress more efficiently. When you combine an infrared sauna with a cold plunge outdoors, the effect is amplified. You get the deep, penetrating warmth of far-infrared waves (around 120-150°F) without the oppressive ambient heat of a traditional sauna, followed by the shock of water that constricts vessels and numbs inflammation.
Research suggests contrast therapy can reduce delayed onset muscle soreness (DOMS) by 20-50%, improve circulation, and boost mental resilience. Outdoor settings add another layer: exposure to nature lowers cortisol, enhances mood, and lets you breathe deeply without recirculated air. The outdoor infrared sauna plunge setup allows you to cycle between heat and cold without a gym membership or spa schedule. For biohackers, this is the ultimate tool for active heat recovery and deliberate cold exposure, packaged into a daily ritual that fits your backyard.
A 2022 review in Temperature confirms that alternating heat and cold stress improves cardiovascular function and metabolic health. But the real magic happens when you do it consistently. You become more resilient to temperature extremes, your sleep deepens, and your recovery accelerates. Whether you are a weekend warrior or a hard-charging CEO, this zone becomes your daily reset button. And placing it outdoors, under the sky, on a pad of gravel or deck, makes the experience feel less clinical and more primal. That is the cold plunge and sauna guide we will follow here: pragmatic, science-backed, and built for real life.
Essential Equipment: Choosing Infrared Sauna and Cold Plunge for Outdoors
For an outdoor infrared sauna plunge setup, select equipment rated for weather exposure. Infrared saunas like Clearlight or Sunlighten offer models with weather-resistant cabinetry, low EMF, and low-ELMF (electric and magnetic fields). Avoid any indoor-only units, they will warp or degrade within a season. Infrared saunas operate at 120-150°F, which is ideal for outdoor use because lower ambient heat is more tolerable in summer and still effective for sweating. Traditional saunas hit 180-200°F, which can feel overwhelming in open air.
For the cold side: you need a plunge that holds at least 50-60°F for beginners or 40-50°F for advanced. The Plunge brand offers an all-in-one tub with integrated chiller and filtration, plug it in, set the temperature, and use it year-round. Ice Barrel is a more affordable, durable barrel that works with a lid and ice packs. Morozko Forge handcrafts wood-fired or electric cold plunges with a more premium aesthetic. For a true DIY cost-saver, you can convert a stock tank or chest freezer into an ice bath, but you will need a chiller and pump to maintain temperature. Here is a comparison of top options:
| Product | Type | Temperature Range | Price Range | Best For |
|---|---|---|---|---|
| Clearlight Outdoor Sanctuary | 2-person infrared sauna | 120-150°F | $4,000-$6,000 | All-weather, low EMF |
| Sunlighten mPulse | 1-2 person infrared | 120-150°F | $6,000-$8,000 | Programmable, chromotherapy |
| Sun Home Saunas Near-Infrared | Portable cabin | 120-140°F | $1,500-$2,500 | Budget, near-infrared |
| Plunge (plunge.com) | Cold plunge with chiller | 40-60°F | $5,000-$6,000 | Plug-and-play, consistent temp |
| Ice Barrel | Cold barrel | 50-60°F (with ice) | $800-$1,200 | Beginner, simple setup |
| Morozko Forge | Wood-fired or electric | 38-50°F | $7,000-$10,000 | Premium, aesthetic |
5 Steps to Planning Your Outdoor Contrast Therapy Space
Step 1: Measure your backyard and choose a location. You need at least 100 square feet for a compact zone: a 4x6 ft sauna footprint and a 4x4 ft cold plunge, plus a 3-foot buffer zone between them for safe transition. Place them near a door to minimize walking distance in cold weather.
Step 2: Prepare the foundation. A concrete pad is ideal, level, durable, and easy to clean. Gravel or decking works too, but must be properly graded for drainage. Avoid turf or dirt: they become muddy and attract pests.
Step 3: Plan drainage for the cold plunge. The plunge will overflow when you enter or splash. Install a French drain, dry well, or a grated trench that directs water away from the foundation. If you are on a budget, a simple gravel pit works.
Step 4: Run electrical service. Most outdoor infrared saunas need a 240V/30A circuit with GFCI protection. Cold plunge chillers require a standard 120V/15A outlet. Hire a licensed electrician to install conduit and outdoor-rated outlets. Obtain permits as required by local codes.
Step 5: Design the pathway and safety features. Connect the sauna and plunge with a non-slip rubber mat or textured tiles. Add outdoor lighting for evening sessions, a towel hook, and a timer. Check HOA restrictions: some limit structure height or placement. Plunge
Step-by-Step Installation Guide for Your Outdoor Sauna and Cold Plunge
Sauna assembly: Start with the foundation, compacted gravel or a concrete pad, at least 2 inches thick larger than the sauna footprint. Follow the manufacturer's instructions for panel assembly. Most outdoor infrared saunas are modular: you join wall panels, attach the roof, and secure the door. Seal all seams with weatherstripping. Level the unit using shims if needed. Plug into the dedicated 240V/30A circuit.
Cold plunge installation: Plug-and-play plunges like the Plunge require minimal effort: place it on a level surface near a GFCI outlet, fill with water (100-150 gallons), and set the temperature on the chiller. For DIY setups (e.g., stock tank), you will need to install a chiller, pump, filter, and possibly a circulation line. Ensure all connections are tight and insulated. Add a sanitizer (e.g., bromine or ozone) to prevent algae. For in-ground or semi-permanent setups, consult a plumber.
Winterization: In freezing climates, use a plunge with a heater/chiller that has a freeze protection mode. Otherwise, drain and store it indoors. Cover the sauna when not in use and check electrical connections for moisture. Plunge
Mastering Contrast Therapy Protocols: Timing, Cycles, and Safety
The optimal contrast therapy protocol recommended by Dr. Rhonda Patrick is to start with heat, end with cold. Warm up in the sauna for 3-4 minutes at 120-150°F until you break a sweat, then transition directly to the cold plunge at 50-60°F for 1-2 minutes. Repeat 3-4 cycles. Total session time: about 20 minutes. Beginners should start with 2 cycles and shorter cold exposure (30 seconds to 1 minute). As you adapt, extend cold to 2 minutes and lower temperature toward 40°F.
Safety is paramount. Signs of hypothermia include shivering, confusion, or numbness. If you start shivering uncontrollably, stop. Avoid alcohol before or during sessions, it impairs thermoregulation. Hydrate before and after. Use a timer to keep track of cycles. People with cardiovascular issues, high blood pressure, or epilepsy should consult a doctor first. The Wim Hof method emphasizes breathing before cold, but never hyperventilate in the water.
The physiological effect: sauna heat increases heart rate and sweats out toxins; cold plunge constricts vessels, reducing inflammation and producing a rush of dopamine and endorphins. This cycle trains your autonomic nervous system to recover faster from stress. A 2021 study in PLOS ONE found that 4 weeks of contrast therapy improved heart rate variability (HRV) and sleep quality. Plunge
Outdoor Contrast Therapy Zone Budget: Low-End to Premium Setup
Here is a realistic contrast therapy cost breakdown based on equipment quality:
| Tier | Sauna | Cold Plunge | Total Estimated Cost |
|---|---|---|---|
| Low | Sun Home Saunas Near-Infrared ($1,500) | DIY stock tank + chiller ($700) | $2,200-$3,500 |
| Mid | Clearlight Outdoor Sanctuary ($4,000) | Plunge ($5,000) | $9,000-$10,500 |
| Premium | Sunlighten mPulse ($6,000) | Morozko Forge ($7,000) | $13,000-$16,000 |
Hidden costs include electrical installation ($500-$2,000), permits ($100-$500), foundation materials ($200-$1,000), and ongoing maintenance (water treatment, electricity for chiller ~$30/month). Financing options: Plunge offers monthly payments from $95/month. Many sauna brands offer 0% APR financing. The investment pays dividends in recovery time, stress levels, and avoidance of spa fees. For an outdoor infrared sauna plunge setup, prioritize quality over initial price, cheap saunas may have high EMF and poor weather sealing.
Year-Round Maintenance and Winterization for Your Outdoor Contrast Therapy Zone
Sauna care: Wipe down interior panels after each use to prevent mold. Check weather seals monthly. In humid climates, run the sauna with the door open for 10 minutes after use to dry out. Re-stain wood finishes annually. Cover the unit with a weatherproof tarp when not in use.
Cold plunge maintenance: Use a filter and sanitizer (bromine tablets or ozone generator) to keep water clear. Test pH weekly, target 7.2-7.6. Drain and refill every 2-3 months. In freezing weather, if your plunge has a chiller with freeze protection (like Plunge), set it to above 40°F. Otherwise, drain the tub completely, disconnect hoses, and store indoors. Ice forming on the surface is safe; ice inside may damage the chiller pump.
Electrical and foundation check: Inspect GFCI outlets and breakers annually. Look for cracking in the pad or gravel shifting. Ensure pathway drainage remains clear. With regular care, your outdoor contrast therapy zone will last a decade or more.
FAQs
Can I put an infrared sauna outdoors? Yes, as long as it is rated for outdoor use. Models like Clearlight Outdoor Sanctuary are designed with weather-resistant cabinetry.
How close can the cold plunge be to the sauna? We recommend a 3-foot buffer zone for safe transition, but ensure there is a non-slip path between them.
How long should I wait between sauna and cold plunge? Transition immediately; the rapid change is key for contrast therapy benefits. Aim for less than 30 seconds.